Manage user groups
The Groups page in the Clovis administration console lets you create and configure user groups. A group brings accounts together so they can share access to an agent in ChattyBot.
The groups, members, and actions available depend on the permissions assigned to your account.
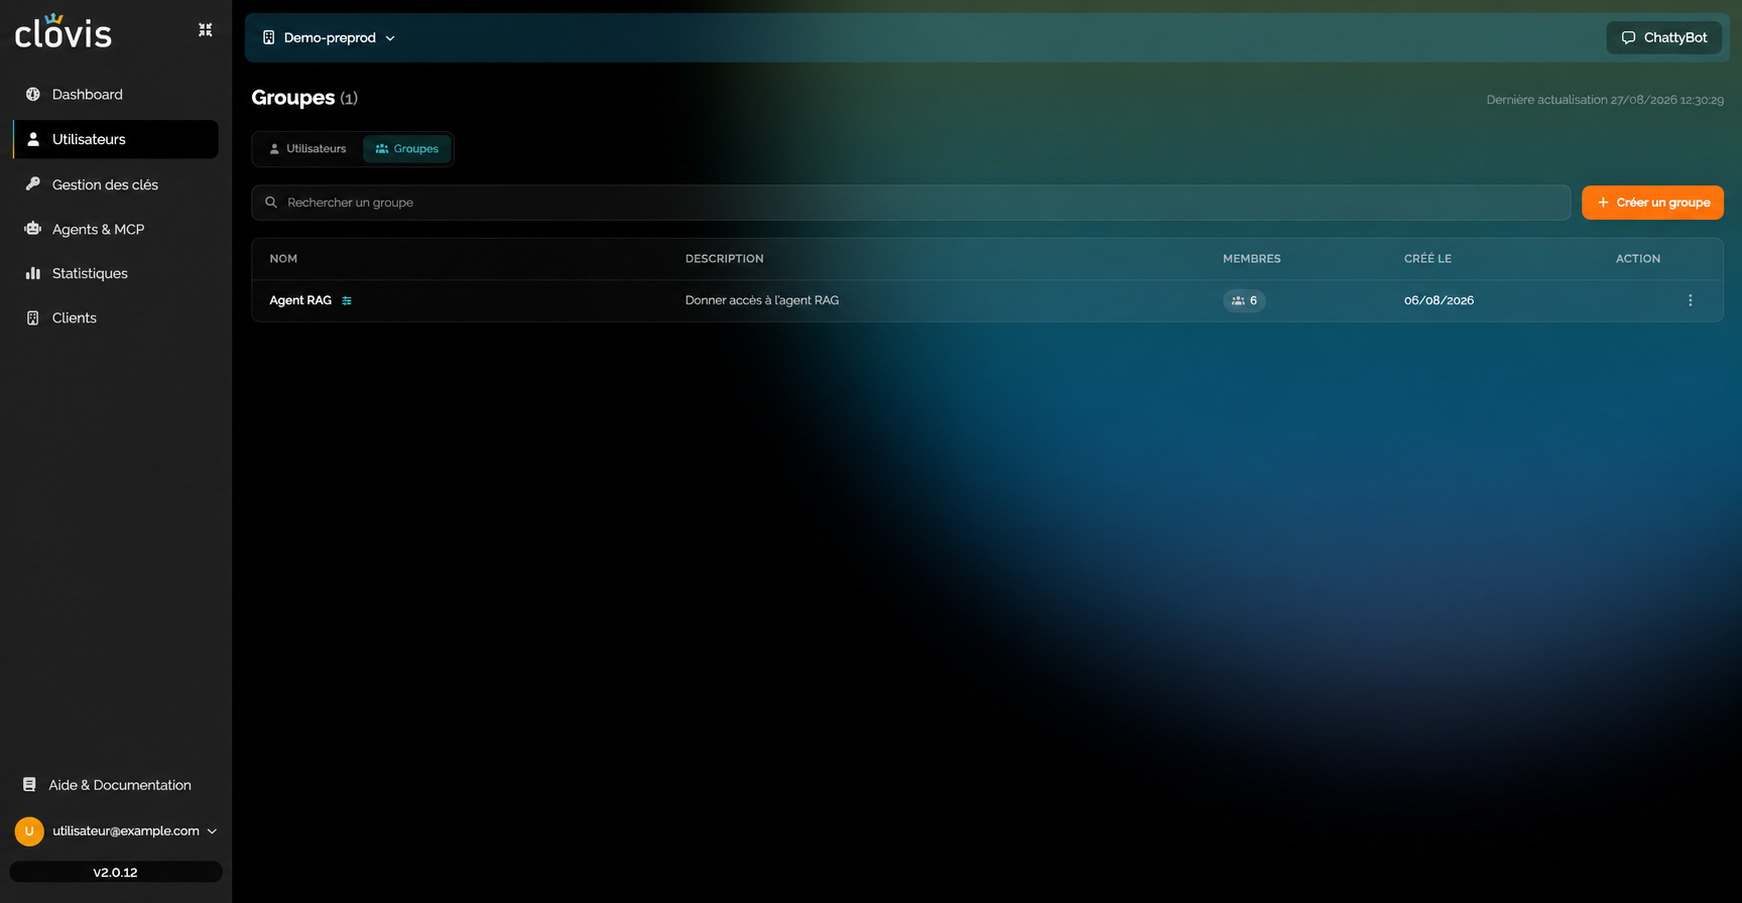
Group context and uses
A user group grants several people access to an agent at once. When an agent is added to a group, all its members see it in ChattyBot. This simplifies access management because the agent does not need to be added to every user account individually.
To access groups:
- Open the console side navigation and select Users.
- Select the Groups tab to switch from the individual user view.
View and search for a group
The total number of groups appears next to the page title. Use:
- Search for a group to find a group by name;
- the pagination controls below the table to browse all results.
The table shows the following information for each group:
| Column | Description |
|---|---|
| Name | Group name displayed in ChattyBot. |
| Description | Free text explaining the group's purpose. |
| Members | Number of users in the group. |
| Created on | Group creation date. |
| Action | Menu containing the available group operations. |
Create a group
- Select Create a group in the upper-right corner.
- On the modal's Information tab, complete these fields:
| Field | Description | Required |
|---|---|---|
| Name | Group name, visible to members in ChattyBot. | Yes |
| Description | Free text explaining the group's purpose. | No |
| Contact email | Email address of the person responsible for the group. | No |
- Select Create group.
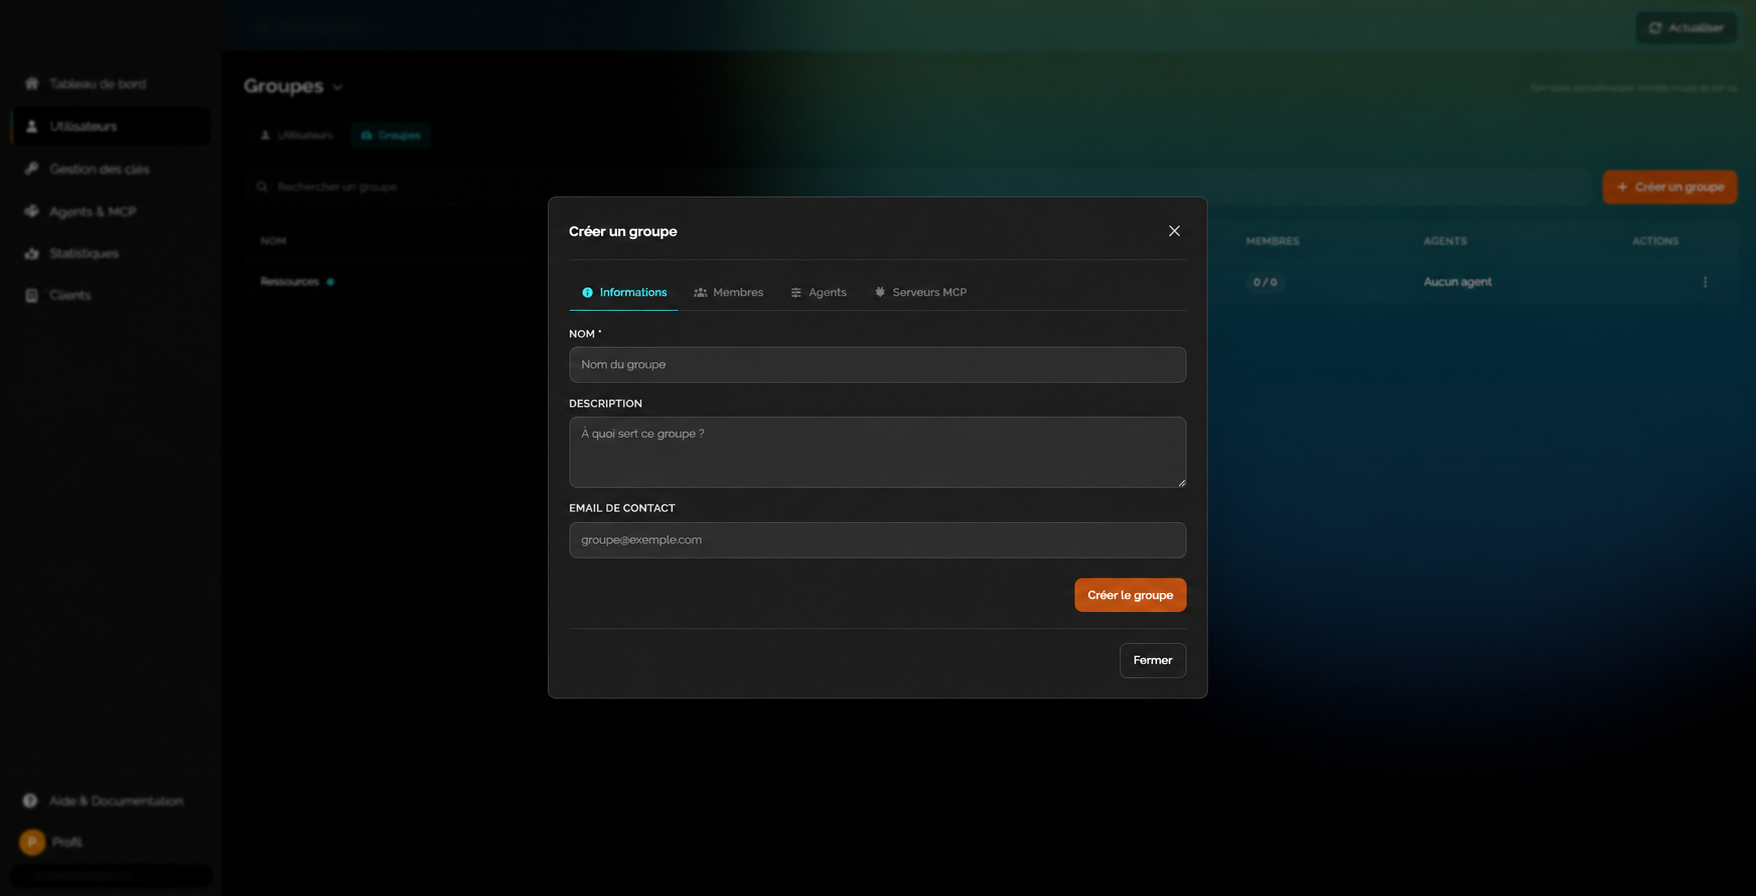
After creating the group, use the Members and Agents tabs to configure access.
Add members to a group
The Members tab in the group management window contains two columns:
- the group's current members on the left;
- the Add a user search and selection area on the right.
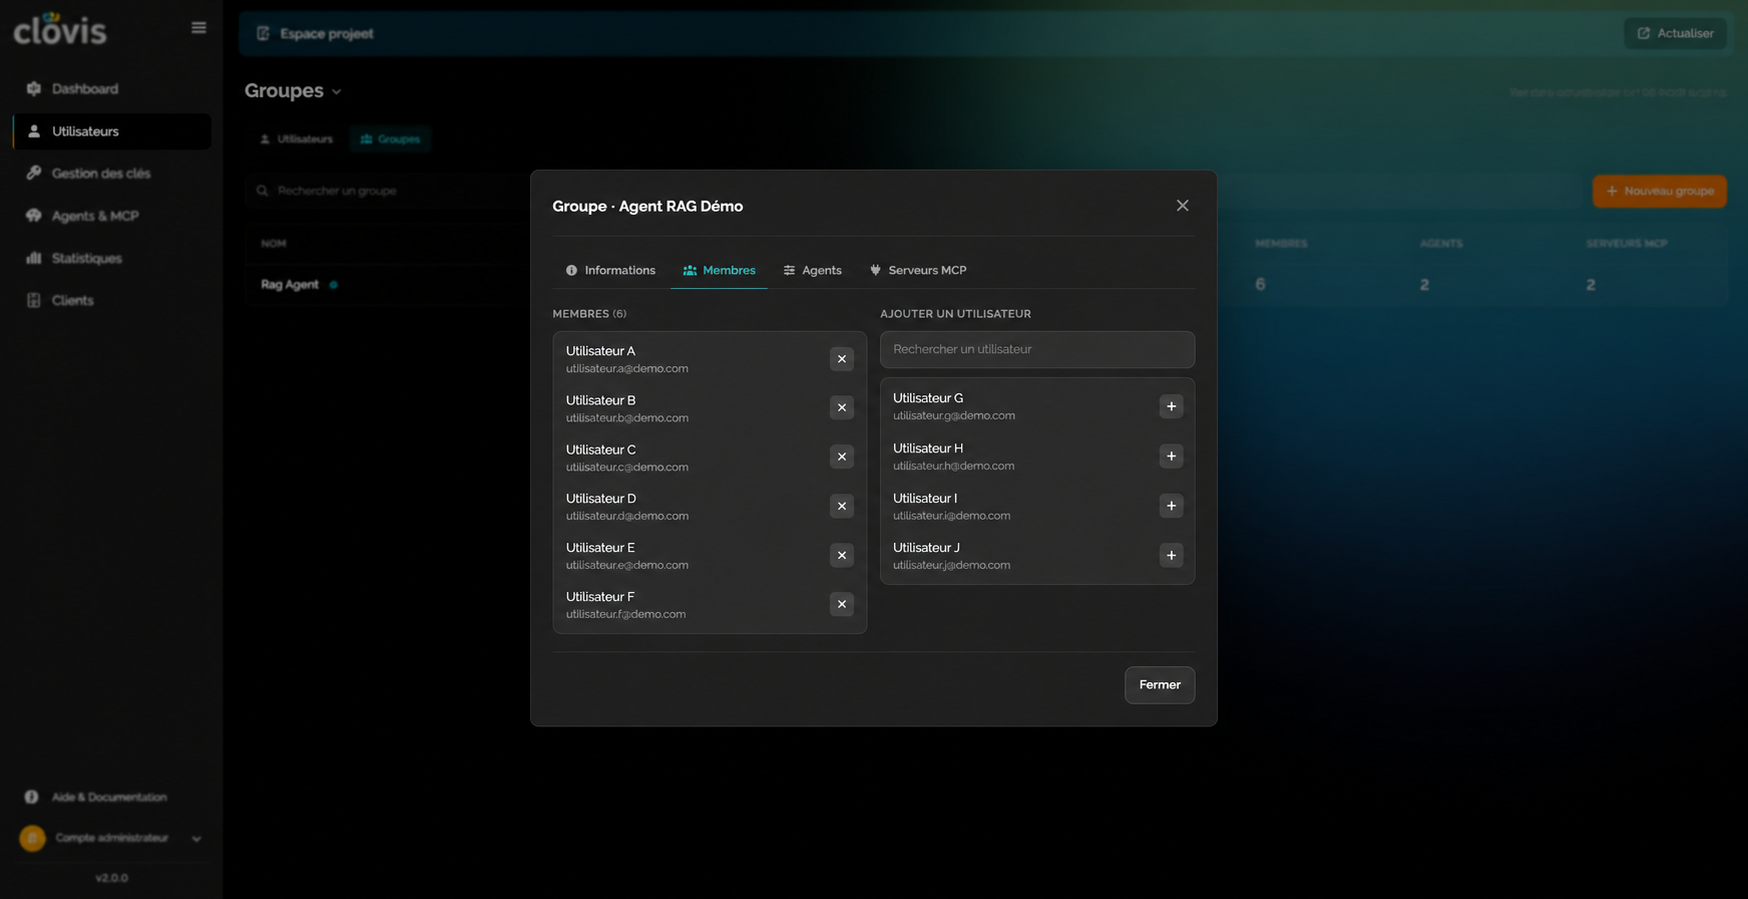
To add a user:
- Enter a name or email address in Search for a user.
- Matching accounts appear with their name and email address.
- Select the + button next to the required account.
The user will see the agents attached to this group in ChattyBot after approximately one minute.
To remove a member, select the ✕ button next to their name in the left column.
Add an agent to a group
The Agents tab lets you associate one or more agents with the group. The selected agents become available to all group members in ChattyBot.
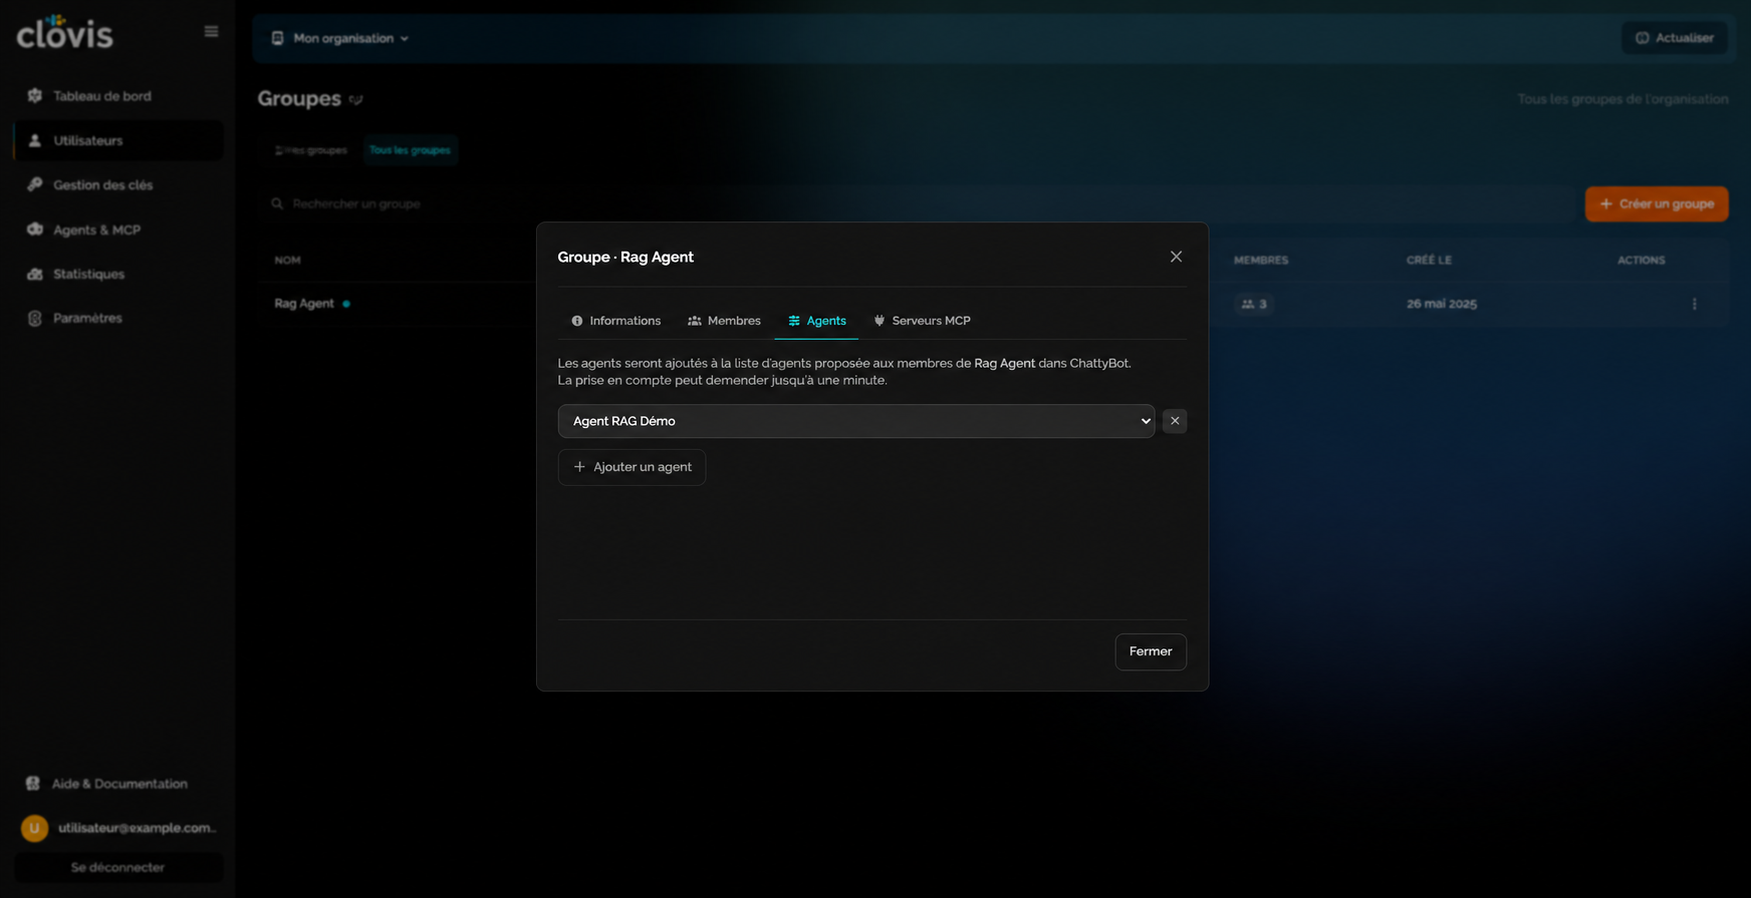
To add an agent:
- Open the Agents tab in the group management window.
- A message explains that agents will be added to the list offered to members and that this may take up to one minute.
- Use the selector to choose the required agent, for example RAG Agent.
- Select Add an agent to confirm.
The agent then appears in the group's agent list. Every group member can use it from ChattyBot; the change may take up to one minute to appear.
Best practices
- give the group a clear name so members quickly understand its purpose;
- write a clear description documenting the objective and intended audience;
- add a contact email so the person responsible can be identified;
- start with a single agent, such as a RAG agent, before adding more.