Use Clovis in GitHub Copilot Chat
Use Clovis as a development assistant directly in Visual Studio Code, through the built-in chat experience provided by GitHub Copilot Chat. With ClovisLLM or ClovisChat, you can ask questions about your code, understand a project, plan changes and, depending on the tools you enable, edit files or run tests without leaving your editor.
This tutorial shows you how to connect your Clovis API key, add the models to the chat model picker, and choose tools that suit your workflow.
In recent versions of VS Code, models using your own API key can work without a GitHub account or a Copilot subscription. Your organization’s administrator may restrict this usage. See the VS Code documentation on bringing your own key if the setup differs on your computer.
1. Open GitHub Copilot Chat
Since VS Code 1.116, GitHub Copilot Chat ships as a built-in extension. On a recent installation, you can open the Chat panel directly without installing it manually from the Marketplace. This change is described in the official VS Code 1.116 release notes.
Open chat using the conversation icon in VS Code. You can also search for GitHub Copilot in the Extensions view to find GitHub Copilot Chat, published by GitHub, and check its status. If AI features have been disabled, enable them again in VS Code settings.
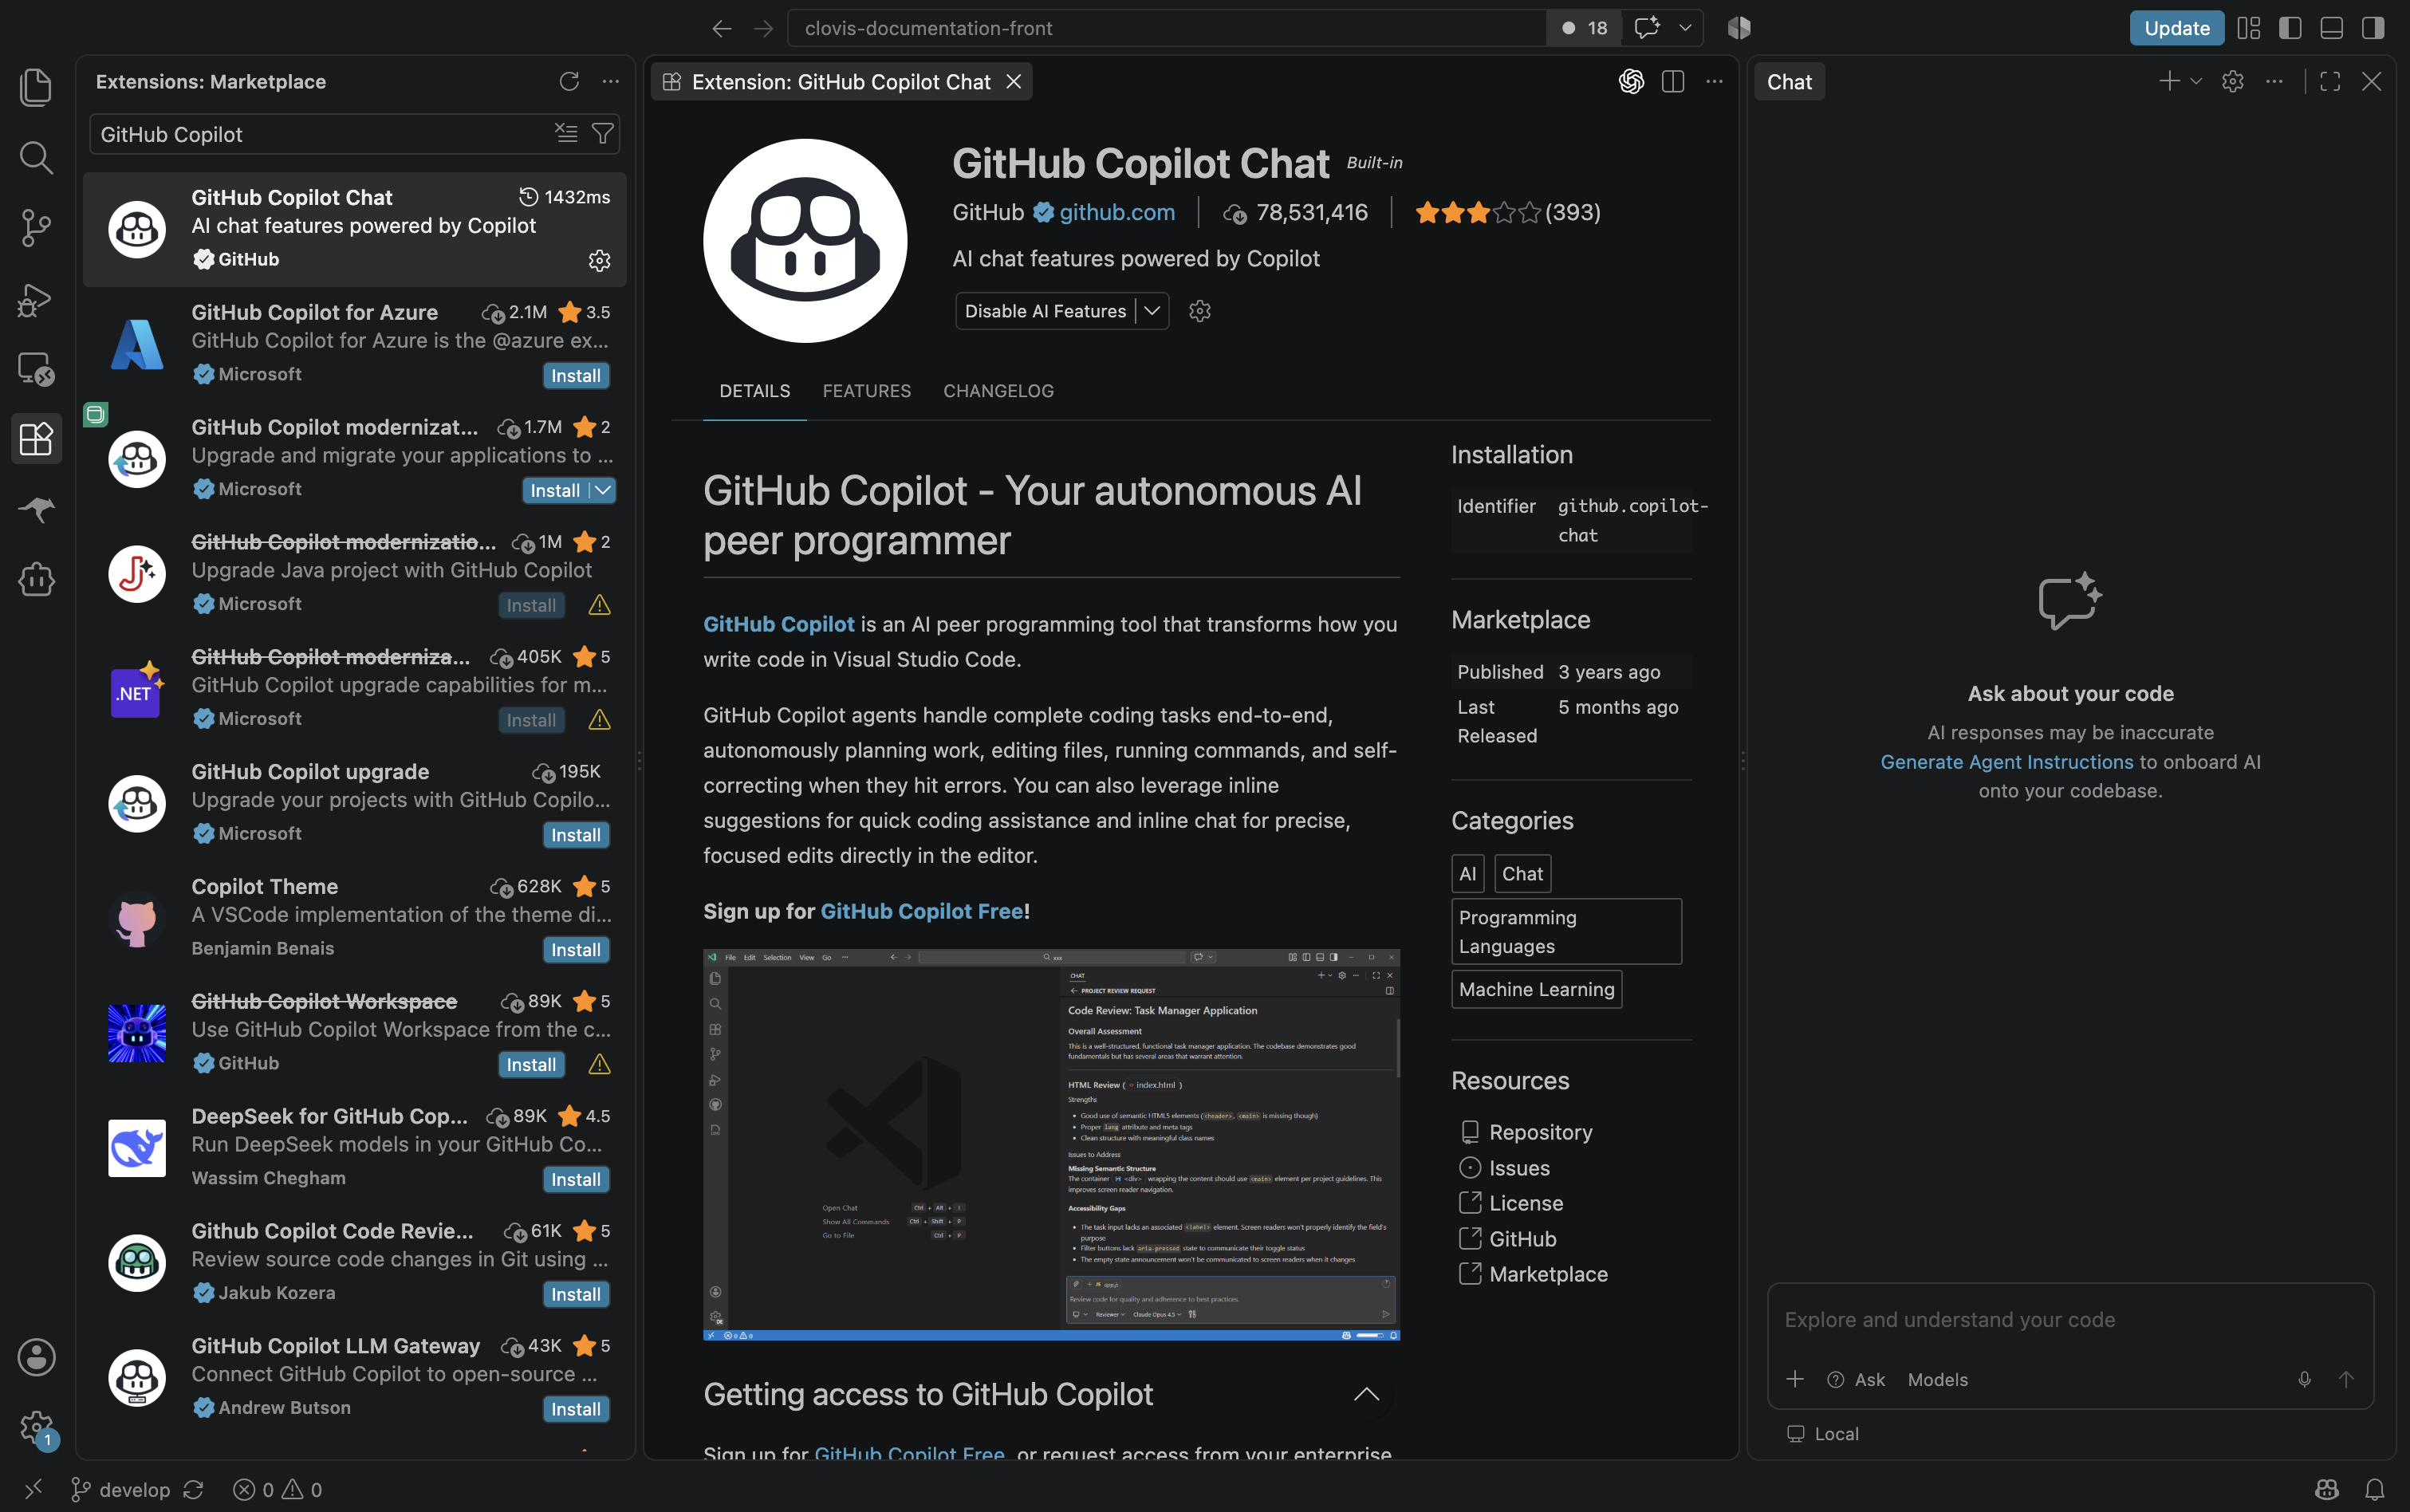
In this screenshot, the extension is already available: the Disable AI Features button indicates that AI features are enabled. The panel on the right contains the input area for your prompts.
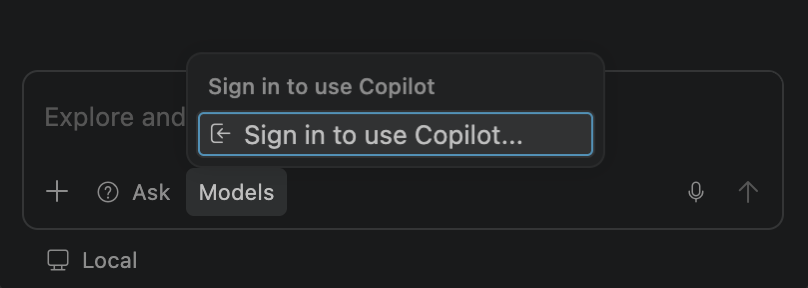
If the interface prompts you to sign in to GitHub
The following screenshot shows Sign in to use Copilot… in the model picker. If you want to use the Copilot services associated with your account, select this option and complete the sign-in process in your browser.
2. Identify the chat mode
Below the input area, the mode menu shown here offers Ask, Plan, and Agent.
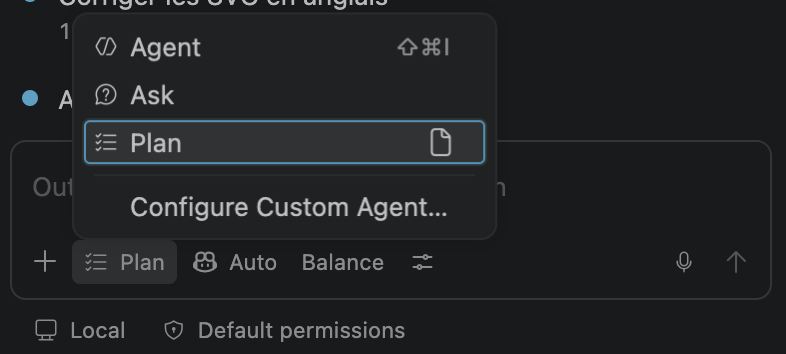
Choose a mode according to your request:
| Mode | Example use |
|---|---|
| Ask | request an explanation of a function or an error |
| Plan | outline the steps for a change before implementing it |
| Agent | assign a task that requires tools and actions on the project |
For your first attempt, start with a simple question in Ask. You can then try planning or editing. You will select the Clovis model in the adjacent menu.
3. Open model management
Click the model name below the input area: Auto in the screenshot. Select Manage Models… from the menu.
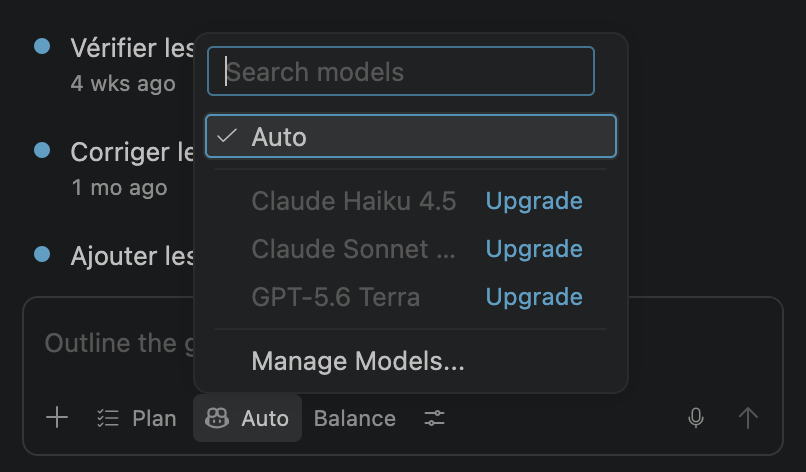
This opens Language Models, the model management window.
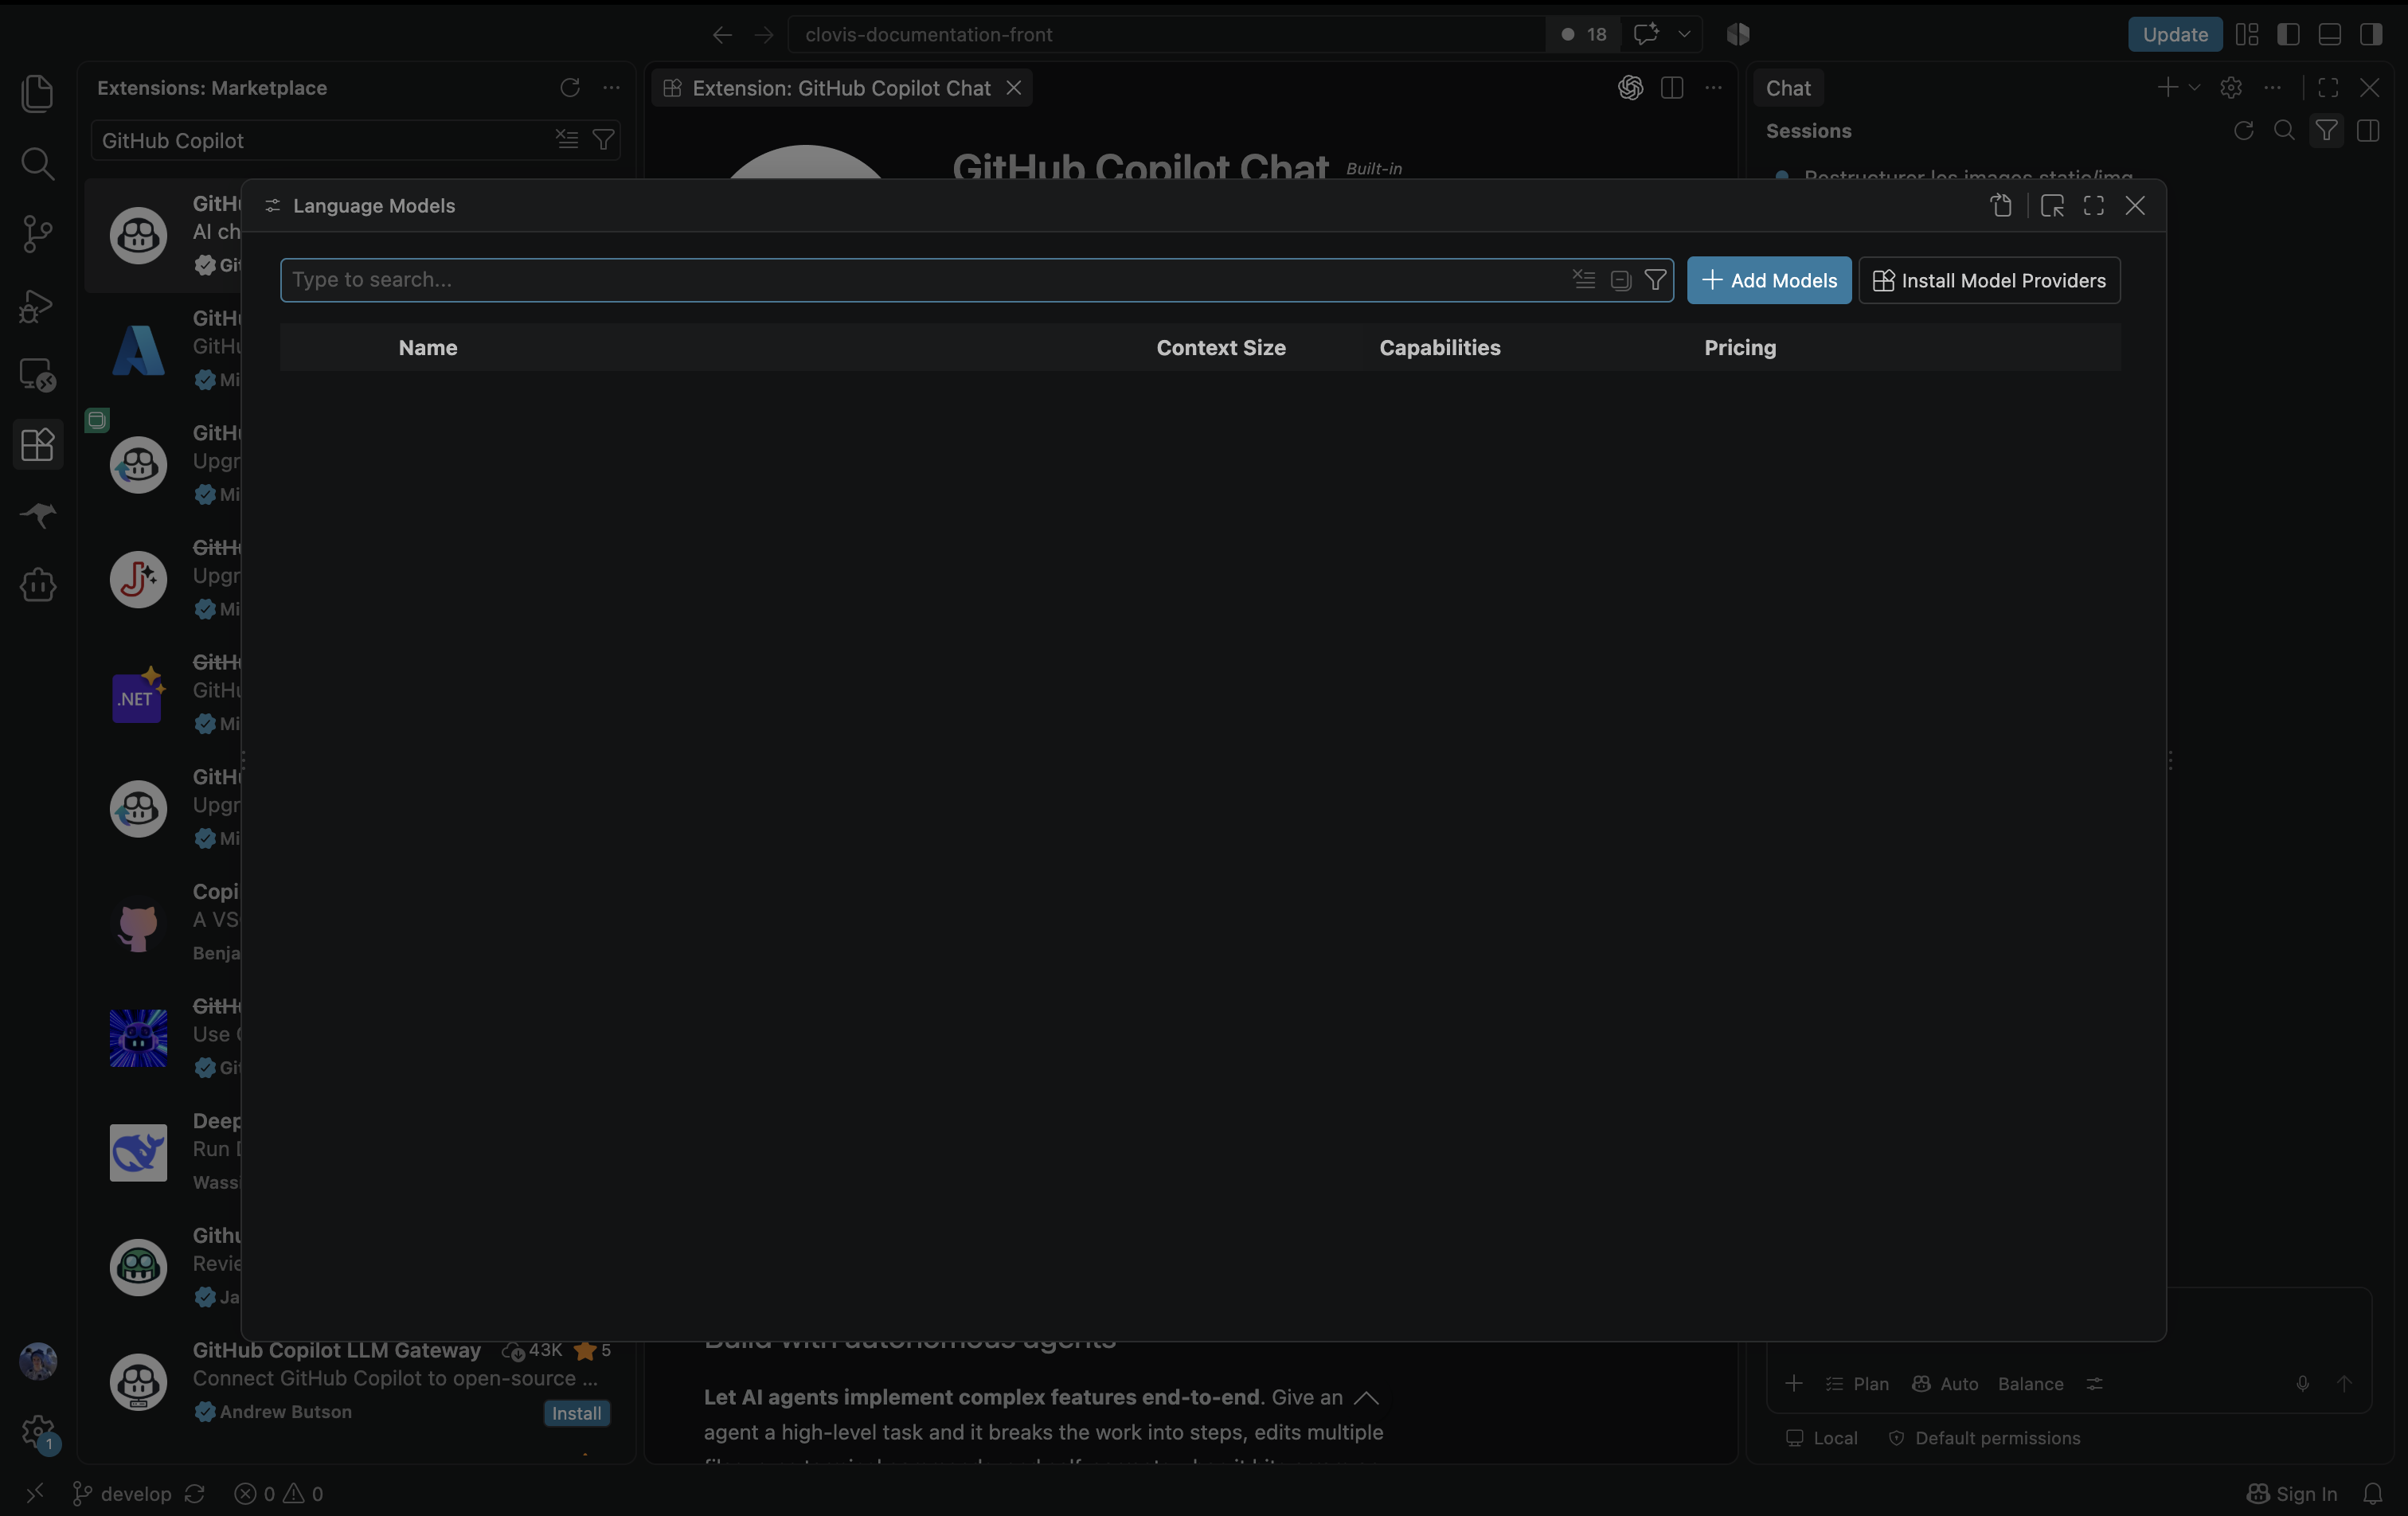
Click Add Models, then select Custom Endpoint. This provider connects to the Clovis API gateway. Install Model Providers installs additional providers; this tutorial uses the built-in provider.
If you cannot find the menu, open the Command Palette with Ctrl+Shift+P on Windows/Linux or Cmd+Shift+P on macOS, then search for Chat: Manage Language Models. This entry point is described in the official VS Code model documentation.
4. Name the Clovis group
The Group Name field defines the name under which your models will be grouped. Enter Clovis.

Press Enter. The group name organizes the display; the technical model IDs will be configured separately.
5. Enter your Clovis API key
Follow the fields provided by VS Code to add your API key.
6. Choose Chat Completions
In Clovis: API Type, select Chat Completions and confirm.
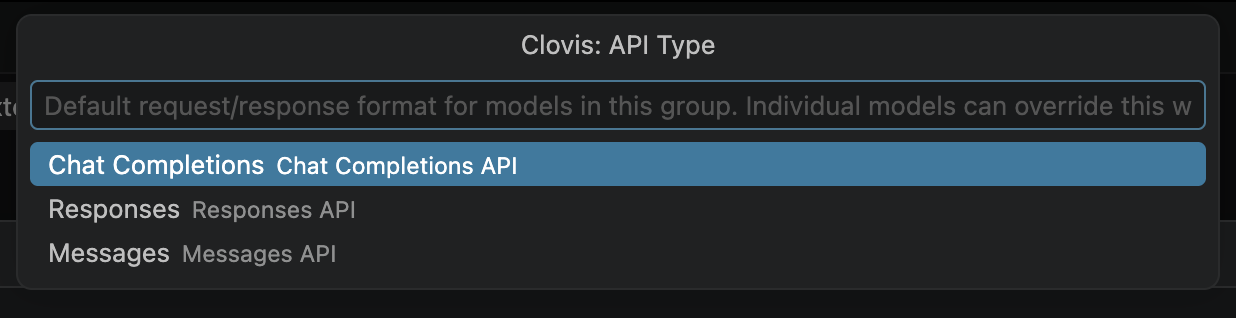
This choice matches the Clovis /v1/chat/completions route used in this tutorial. Keep the same value in the configuration file so that the request format matches the URL.
7. Add the models to the configuration
VS Code opens chatLanguageModels.json. The complete configuration for both Clovis models is shown below. Keep the apiKey value created by your setup wizard: in this example, REFERENCE_GENERATED_BY_VSCODE is a placeholder to replace with your existing reference, not with your plain-text key.
[
  {
    "name": "Clovis",
    "vendor": "customendpoint",
    "apiKey": "${input:REFERENCE_GENERATED_BY_VSCODE}",
    "apiType": "chat-completions",
    "models": [
      {
        "id": "ClovisLLM",
        "name": "ClovisLLM",
        "url": "https://llm-gateway.clovis-ai.fr/v1/chat/completions",
        "toolCalling": true,
        "vision": false,
        "maxInputTokens": 128000,
        "maxOutputTokens": 32000
      },
      {
        "id": "ClovisChat",
        "name": "ClovisChat",
        "url": "https://llm-gateway.clovis-ai.fr/v1/chat/completions",
        "toolCalling": true,
        "vision": true,
        "maxInputTokens": 200000,
        "maxOutputTokens": 62000
      }
    ]
  }
]
If you have already added other providers, keep them in the main array and only add or update the Clovis object. Then save the file.
A generated reference may look like ${input:chat.lm.secret.…}. It points to the secret stored by VS Code: its identifier is specific to your configuration. Use the reference in your own file, even if it differs from the example.
| Property | Role in this configuration |
|---|---|
id | exact, case-sensitive model ID sent to Clovis |
name | name displayed in the picker |
url | full address of the API route |
apiType | Chat Completions format |
toolCalling | declares support for tool calls |
vision | declares whether the model accepts image input |
maxInputTokens / maxOutputTokens | declared limits for input and response tokens |
The capabilities and limits above follow the ClovisLLM and ClovisChat model pages. Adjust them if the service specifications change. For the VS Code field structure, see the Microsoft custom endpoint guide.
8. Check the session tools
If you are using Plan or Agent, open tool configuration using the settings icon near the picker. The Configure Tools window shows the selected tools.
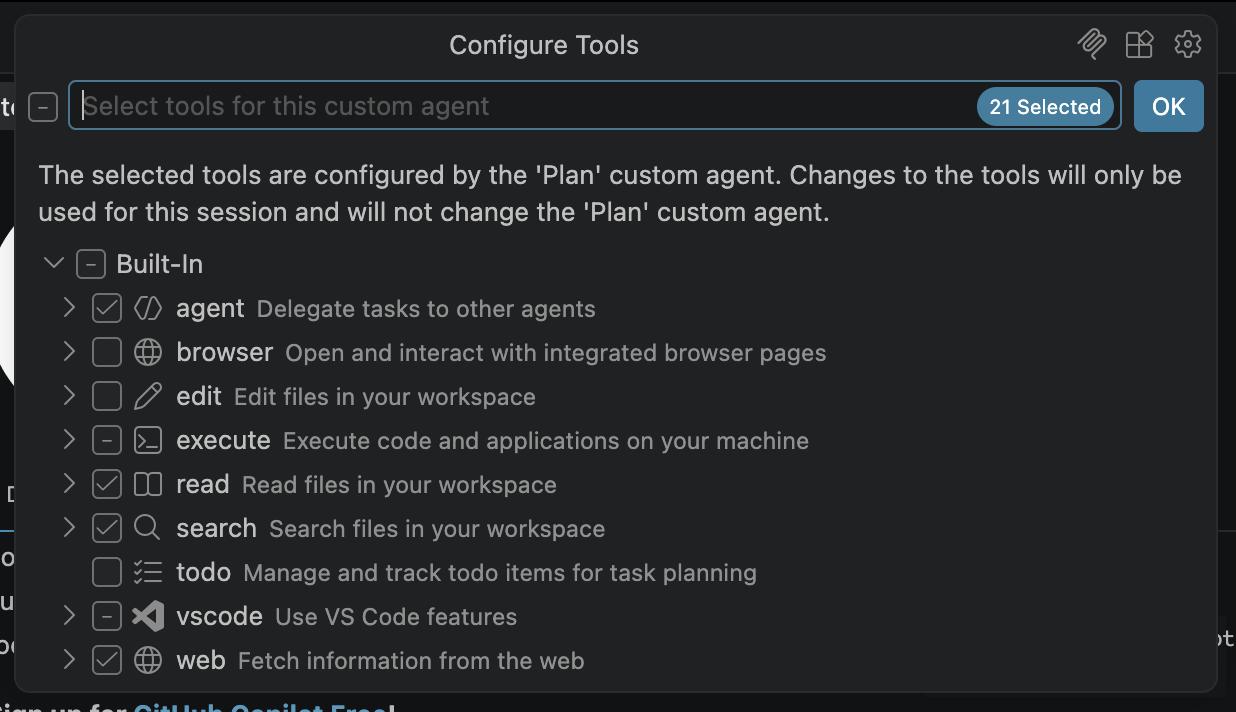
In this screenshot, 21 tools are selected across several families. Checked and partially checked boxes show the current selections; you do not need to reproduce this exact selection for every task.
Understand the tool families
Expand each family to review individual tools before selecting an entire category. The names below match the screenshot; their contents may vary with your version and installed extensions.
| Family | What it enables | When to enable it |
|---|---|---|
| read | read file contents to understand code or configuration | to explain a file, investigate a problem, or prepare a change |
| search | find files, symbols, or passages in the project | to explore a repository and identify files relevant to a request |
| edit | create or modify files using editing tools | to implement a change; leave it disabled if you only want an analysis |
| execute | run commands and code, including in the terminal | to run tests or a build; review the individual tools and proposed commands |
| browser | open pages and interact with the integrated browser | to check a web interface or reproduce a user journey |
| web | fetch content from the Web | to consult documentation or an external resource |
| agent | delegate part of the work to other agents | for a task with several subtasks; optional for a first attempt |
| todo | organize and track a task list | for work involving multiple steps; it does not itself grant file editing access |
| vscode | use editor features | depending on the individual tools your task needs; check each description |
Tools act as intermediaries between the model and your environment: their results may become part of the context sent to Clovis. See the VS Code tools documentation for details.
Choose tools for your goal
To understand a project, start with read and search. For example: “Explain how authentication works and identify the relevant files.” Keep edit and execute disabled in this initial selection.
To modify code, add edit. For example: “Add validation to this form.” Review the file changes before keeping them.
To verify a change, add the necessary execute tools. For example: “Run the tests for this function and explain any failures.” A terminal command can also read, write, or delete files: disabling edit alone does not prevent all changes if command execution remains available.
Enable web or browser when your request needs an online resource or a browser check. You can leave agent and todo disabled for a short request and add them for longer work.
Distinguish tool selection from permissions
Selecting a tool makes it available to the agent. VS Code’s approval rules then determine whether using it requires your confirmation. The Default permissions menu visible in the screenshots controls this second layer; labels may vary by version.
To start, keep the default approval settings and review requests involving commands, external access, or sensitive actions. See the VS Code approvals and permissions guide to adjust this behavior.
Tool selection is not a file exclusion rule. A file manually attached to chat can provide context even if a reading tool is disabled. For an analysis, open the folder relevant to your work and attach the necessary files; avoid attaching files containing secrets such as API keys or a production .env file.
Finally, toolCalling: true in the Clovis configuration declares a model capability. This field does not itself grant access to your files or automatically enable every tool family.
Confirm for the session
Click OK when you have finished selecting tools. The message in the screenshot states that changes apply to the current session and do not change the definition of the Plan custom agent. This step is optional for a simple chat question.
9. Explicitly select a Clovis model
Return to chat and open the model menu again. This second screenshot shows the same entry point after configuration.
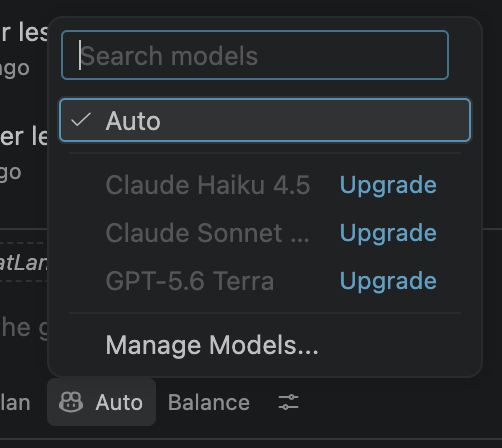
Search for Clovis, then choose ClovisLLM for coding or ClovisChat for general conversation.
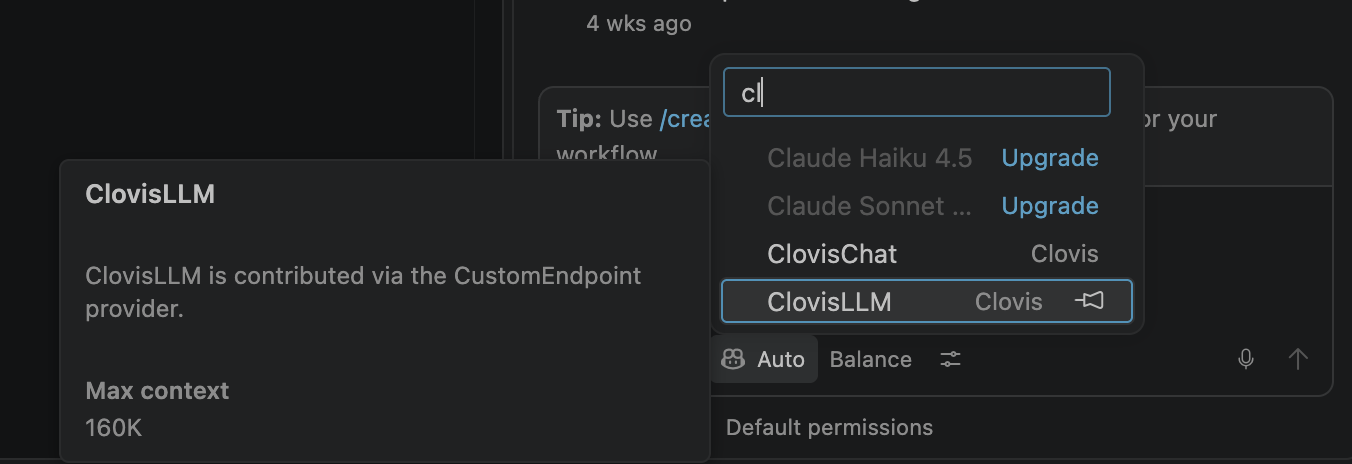
The screenshot shows both models in the Clovis group. The CustomEndpoint tooltip confirms the configured provider. After clicking the model, check that its name appears below the input area before sending your request.
10. Send your first request
Start by testing chat with a short request in Ask:
Explain the difference between a synchronous and an asynchronous function,
with a small TypeScript example.
A response with ClovisLLM selected lets you check the first exchange. To confirm that your key is being used, also check its usage in the Clovis console.
You can then open a project file, add it to the chat context, and try:
Explain the purpose of this file and suggest three improvements.
In Plan, try a request such as:
Prepare a plan to add tests for this function.
Describe the cases to cover before editing any files.
In Agent, start with a specific task, then review the proposed changes and verify the result in your project.
Troubleshooting
| Symptom | What to check |
|---|---|
| Custom Endpoint is missing | update VS Code; in an organization, check the policy allowing personal API keys |
| The model is missing | save the configuration, check its syntax and the model’s visibility in Language Models, then restart VS Code if needed |
| Only Auto is available | check whether the project is in Restricted Mode; only trust folders you recognize |
| Authentication error | check that the Clovis key is active, complete, and has no extra spaces; update it in the provider settings |
| Route error | check the full URL https://llm-gateway.clovis-ai.fr/v1/chat/completions and the chat-completions type |
| Unknown model | use exactly ClovisLLM or ClovisChat and check the access associated with your key |
| Chat works but Agent mode fails | check the declared tool calling capability and the tools available in this session |
| Context length error | reduce attached files or start a new conversation; check the configured limits |
For advanced provider settings, see the official VS Code reference.