Use Clovis with OpenCode Desktop
OpenCode Desktop lets you use ClovisLLM as a coding assistant from a graphical application. Unlike the command-line version, you can install it, configure the provider, and select a project without editing a configuration file.
Prerequisites
- a dedicated Clovis API key for OpenCode Desktop;
- a computer running macOS, Windows x64, or a Linux distribution that uses DEB or RPM packages;
- optional, but recommended: a local Git repository.
The API key provides access to the Clovis service. Never add it to a Git repository, a shared document, or a screenshot.
1. Download and install OpenCode Desktop
Open the official OpenCode download page, then choose the OpenCode Desktop package for your computer:
| System | Download |
|---|---|
| macOS | Apple Silicon or Intel binary |
| Windows | x64 binary |
| Linux | .deb package for Debian/Ubuntu or .rpm package for Fedora/RHEL |
On macOS, you can also install the application with Homebrew:
brew install --cask opencode-desktop
Install the downloaded package, then launch OpenCode Desktop.
2. Open the provider list
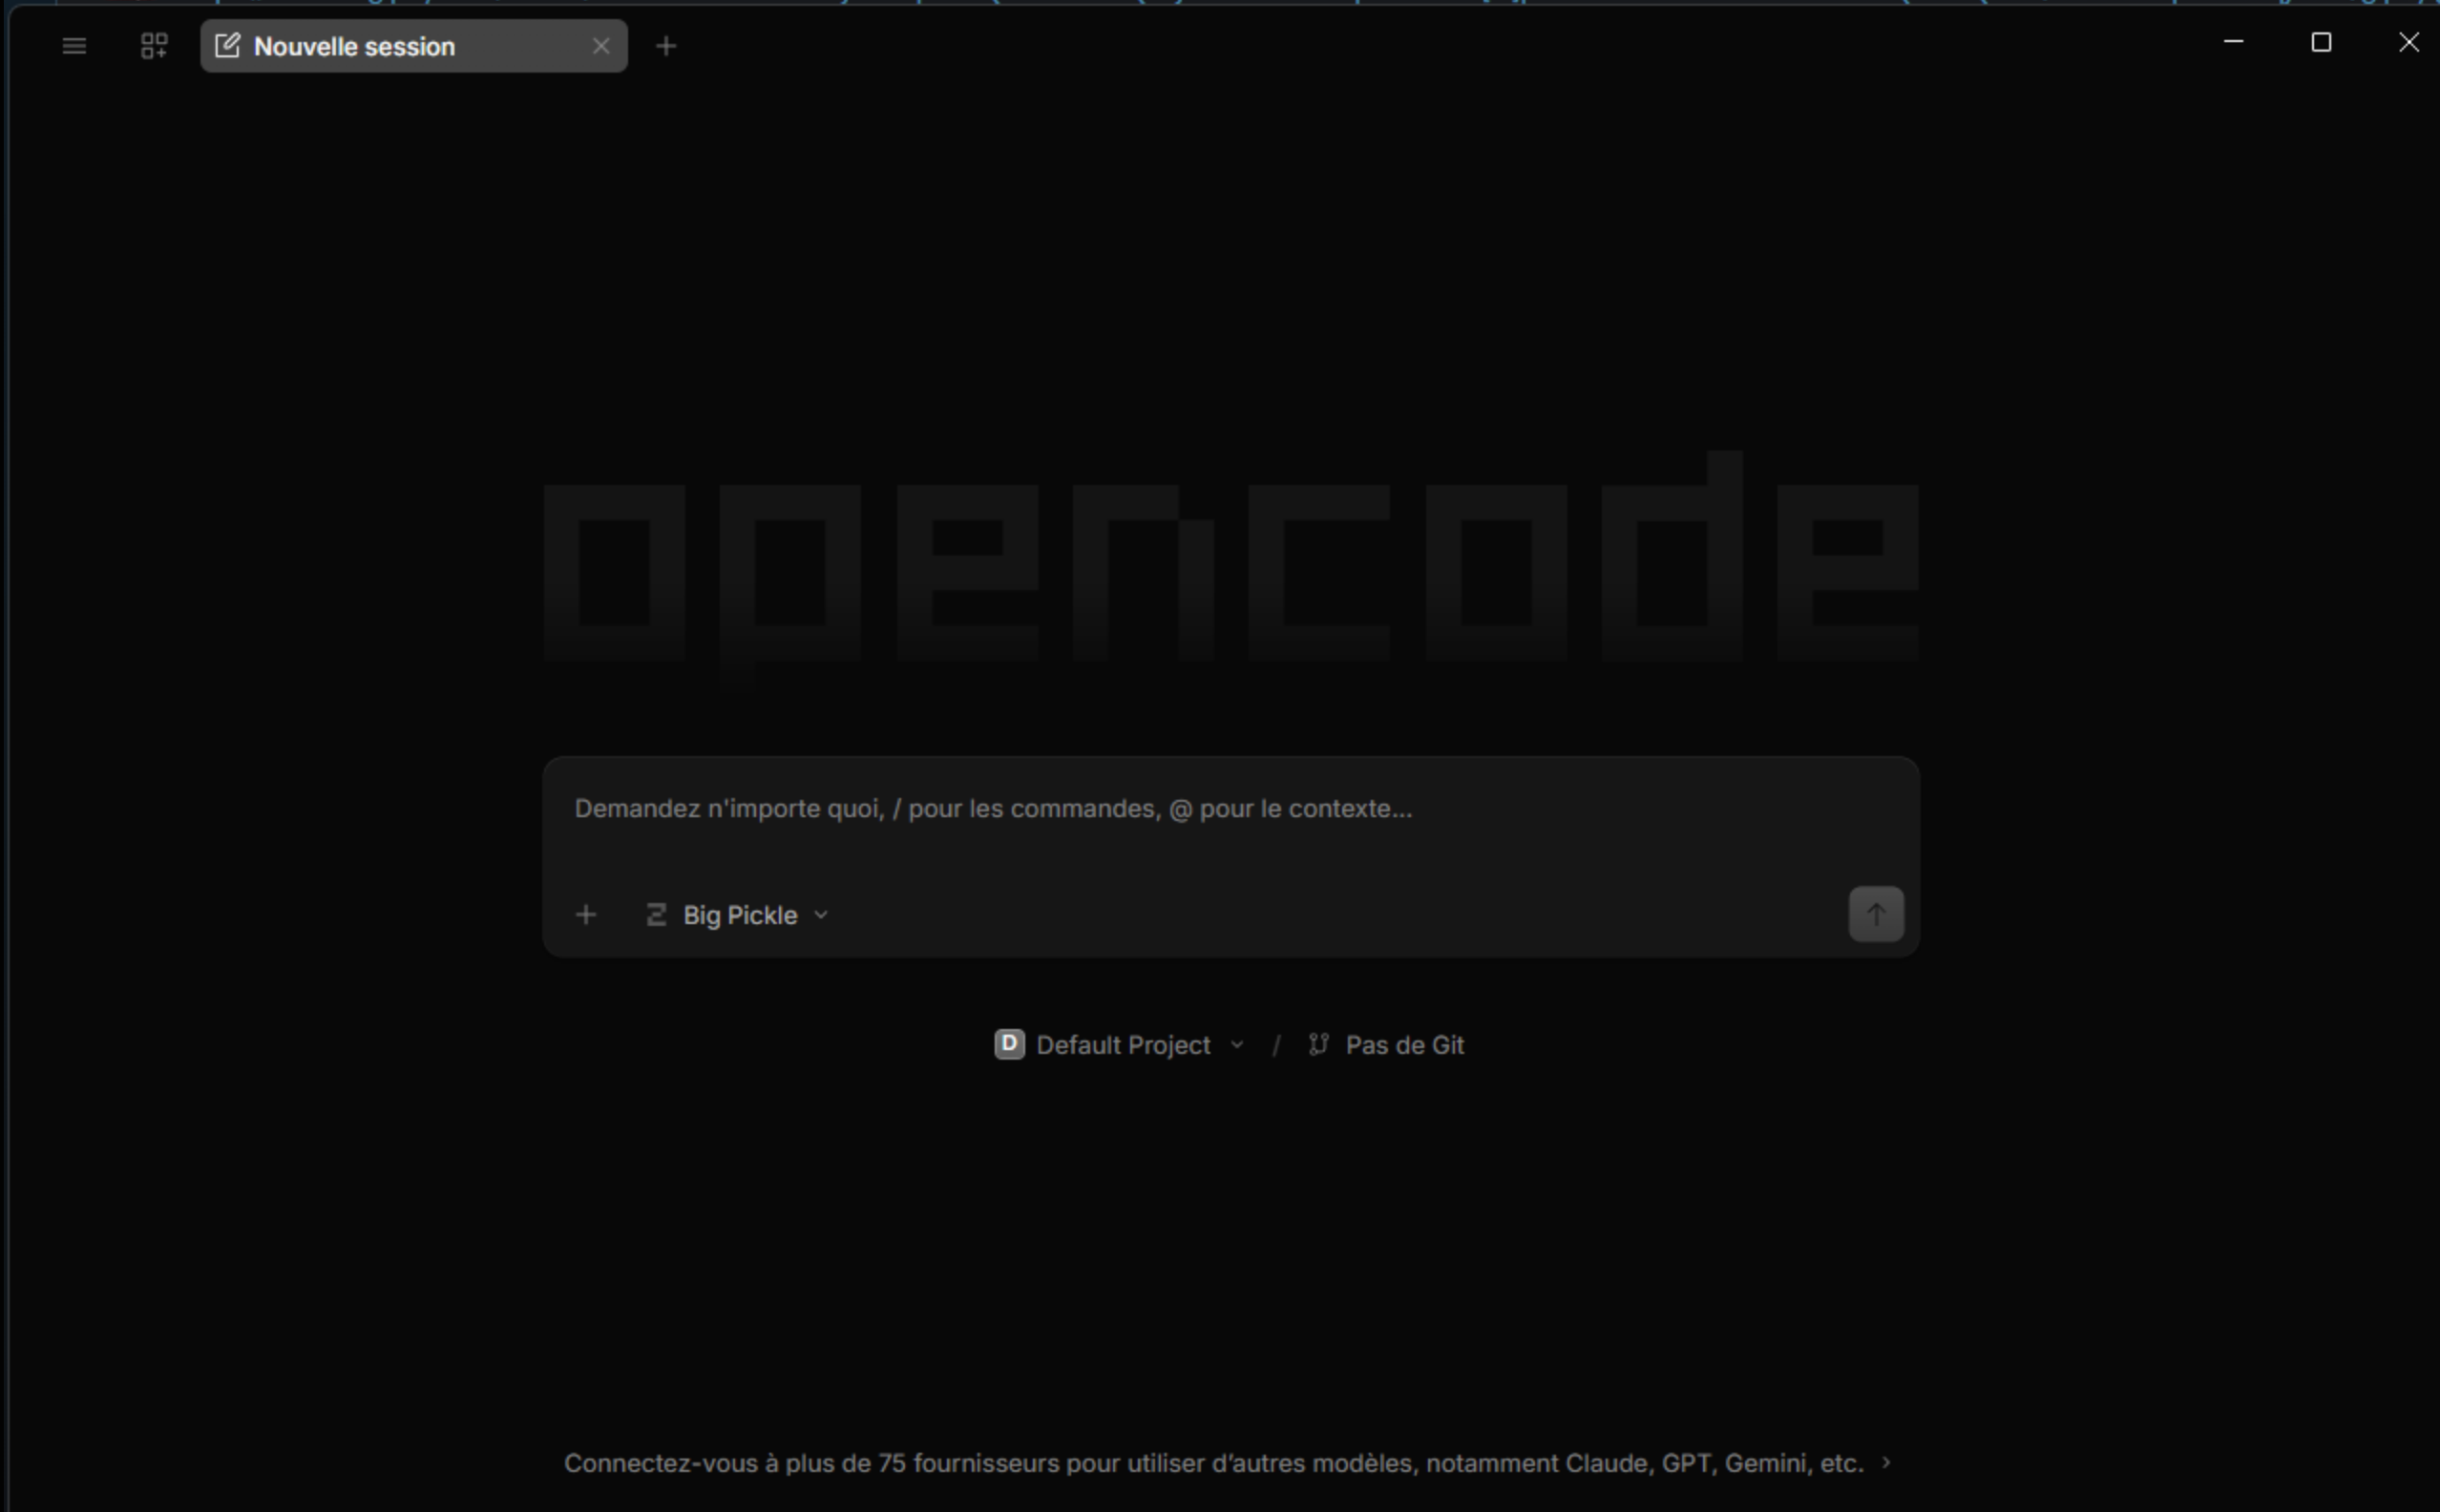
From a new session, click the model name shown below the prompt area.
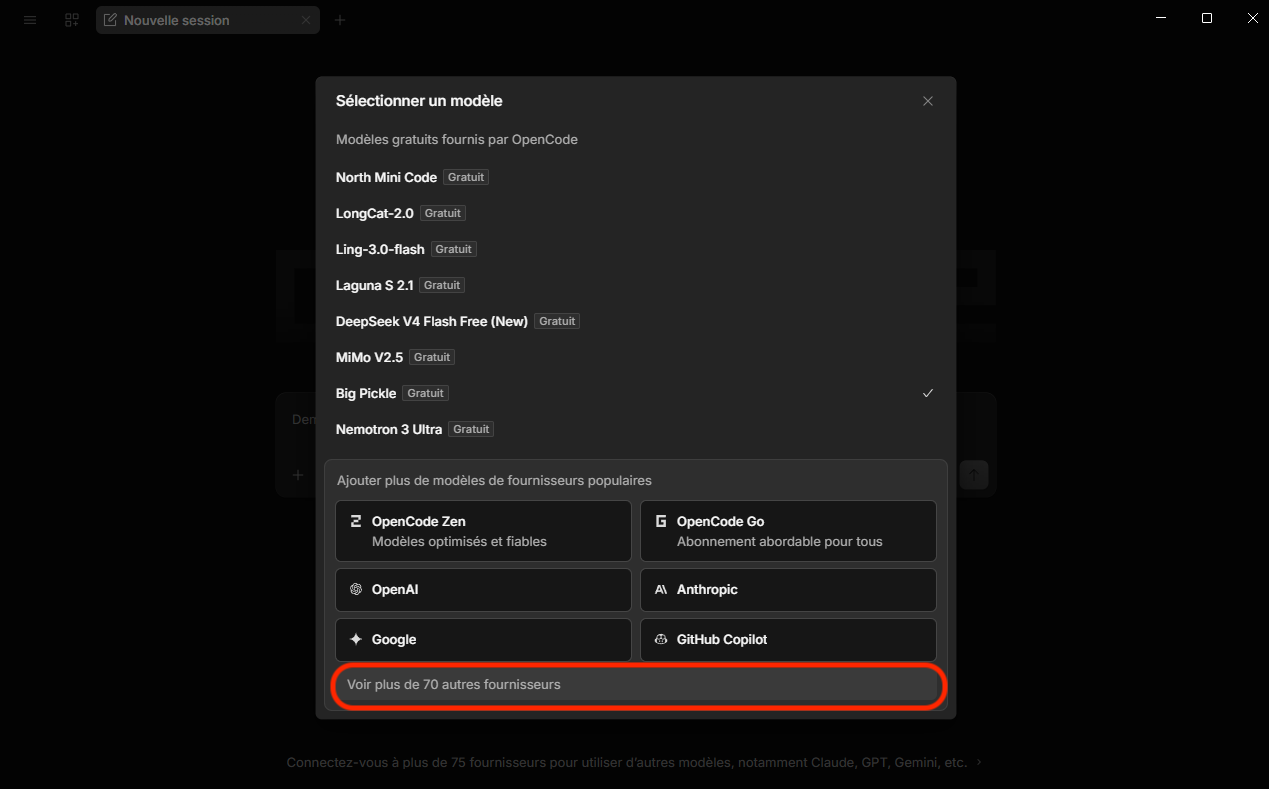
In the Select a model window, click the option to view the complete provider list.
3. Add the Clovis provider
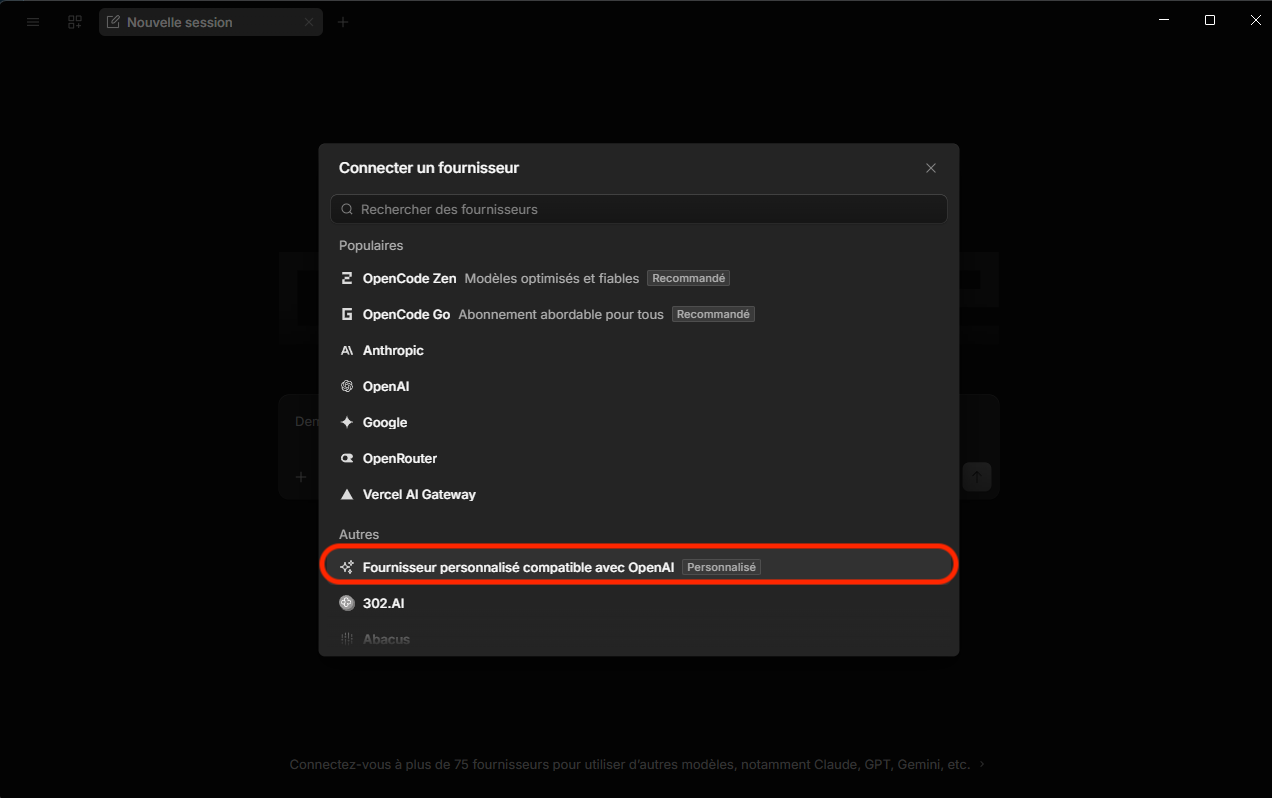
Select the custom OpenAI-compatible provider.
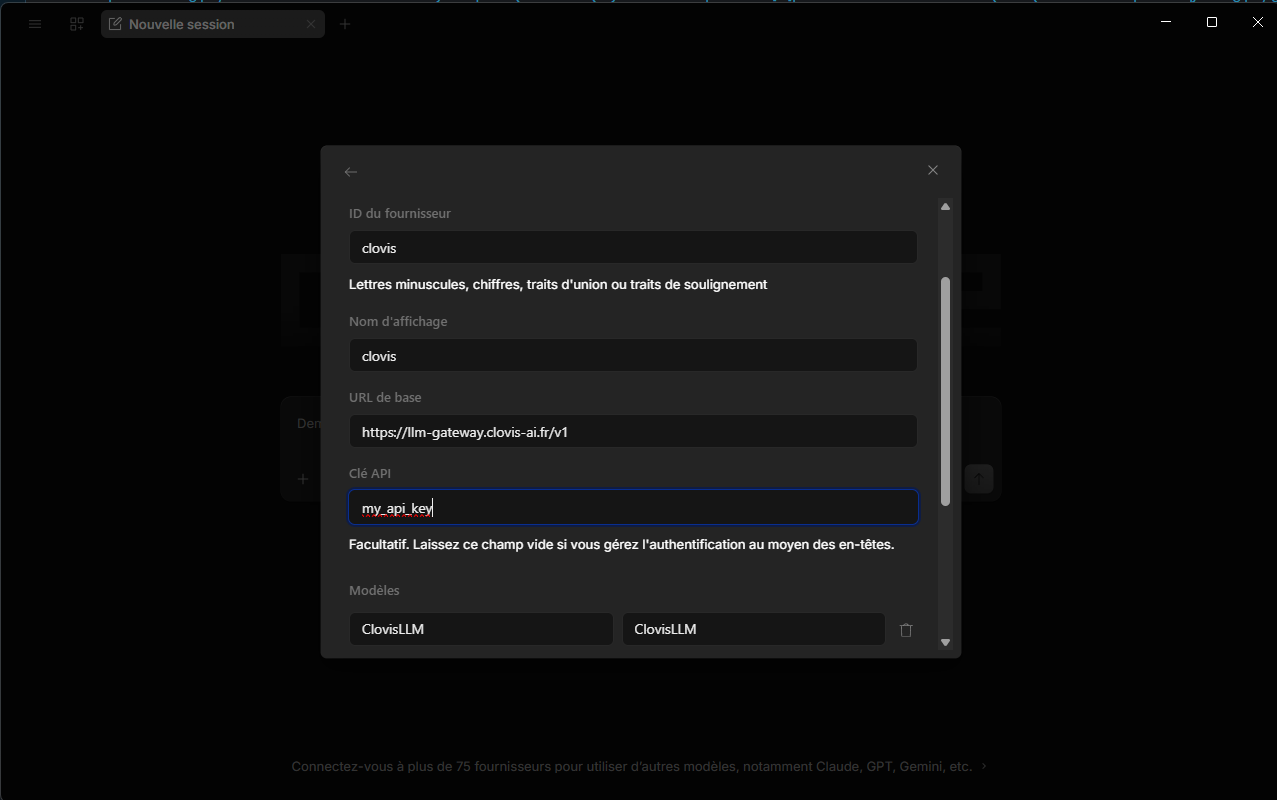
Enter the following values:
| Field | Value |
|---|---|
| Provider ID | clovis |
| Display name | clovis |
| Base URL | https://llm-gateway.clovis-ai.fr/v1 |
| API key | your Clovis API key |
| Model ID | ClovisLLM |
| Model display name | ClovisLLM |
Confirm the new provider.
4. Select ClovisLLM
Open the model selector again, then choose ClovisLLM from the clovis section.
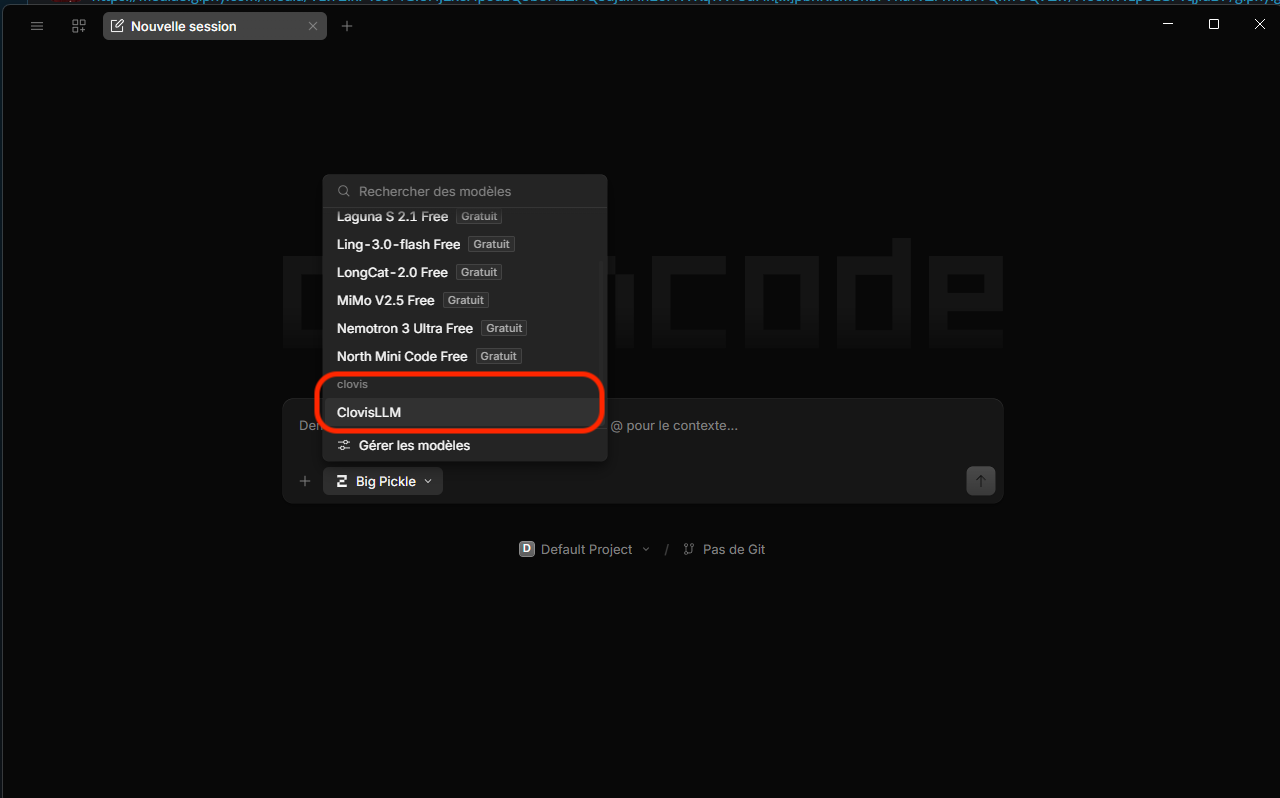
The name ClovisLLM should now appear below the prompt area.
5. Add a project and its Git context
To work on a local repository:
- open the project selector below the prompt area;
- click the option to add a project;
- select the root directory of your Git repository.
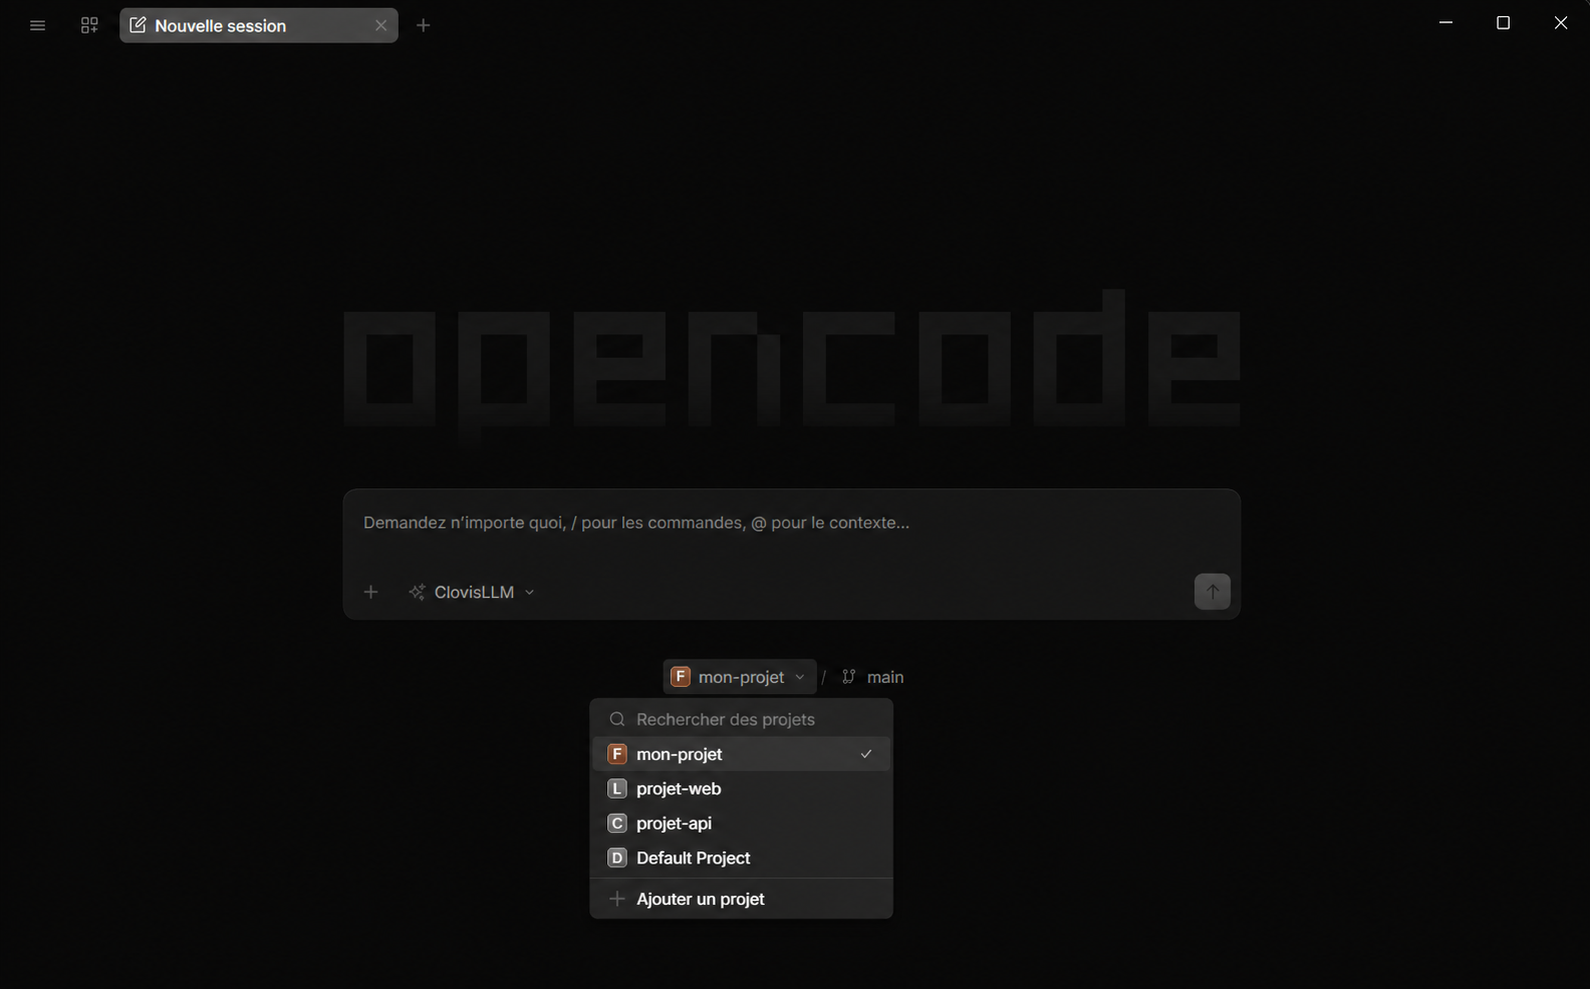
Adding the project gives OpenCode access to the repository files and lets it retrieve the Git context, including the active branch and project changes. The detected branch appears next to the project name.
Select the root of the Git repository rather than a subdirectory so that the assistant receives the full project context.
6. Test the connection
Send a first prompt, for example:
Explain the structure of this project and report the active Git branch.
OpenCode Desktop should answer with ClovisLLM while taking the selected project into account.
Troubleshooting
| Problem | Check |
|---|---|
| ClovisLLM does not appear | check the base URL and both ClovisLLM values, then confirm the provider again |
| Authentication fails | check the key in the Clovis administration console and make sure no spaces were copied before or after it |
| The Git branch does not appear | add the root directory of a repository containing a .git directory |
| The download does not match your computer | return to the official download page and select the appropriate architecture or package format |