Use Clovis with OpenCode from the command line
OpenCode is the recommended integration for using ClovisLLM as a command-line coding assistant. It can explore a project, explain or generate code, and run tasks from the terminal.
This quickstart installs OpenCode, configures the Clovis provider, and starts your first session. For advanced features, continue with the official OpenCode documentation.
See the OpenCode Desktop guide to install the application and configure Clovis without editing a file.
Prerequisites
- Node.js and npm installed;
- a dedicated Clovis API key for OpenCode;
- a terminal opened with your regular user account.
Do not put the API key in opencode.jsonc, and never commit it. The /connect command stores it separately from the configuration.
1. Install OpenCode
The official npm package is named opencode-ai. The same command works on all three platforms.
- Linux
- macOS
- Windows
npm install -g opencode-ai
npm install -g opencode-ai
You can also use the Homebrew tap maintained by OpenCode:
brew install anomalyco/tap/opencode
In PowerShell:
npm install -g opencode-ai
For the best compatibility with Unix development tools, OpenCode recommends WSL. If you use WSL, install Node.js and OpenCode inside your Linux distribution.
Check the installation:
opencode --version
If the command is not immediately recognized, close and reopen the terminal to reload the PATH.
2. Configure the Clovis provider
After installation, the configuration directory and the global opencode.jsonc file are already present. Simply open this file in your text editor, then replace its contents with the Clovis configuration below.
- Linux
- macOS
- Windows
The file is located here:
~/.config/opencode/opencode.jsonc
The file is located here:
~/.config/opencode/opencode.jsonc
In PowerShell, the file is available at:
$HOME\.config\opencode\opencode.jsonc
With WSL, use ~/.config/opencode/opencode.jsonc in your Linux distribution's file system.
Windows reference
The full path looks like C:\Users\user\.config\opencode\opencode.jsonc.
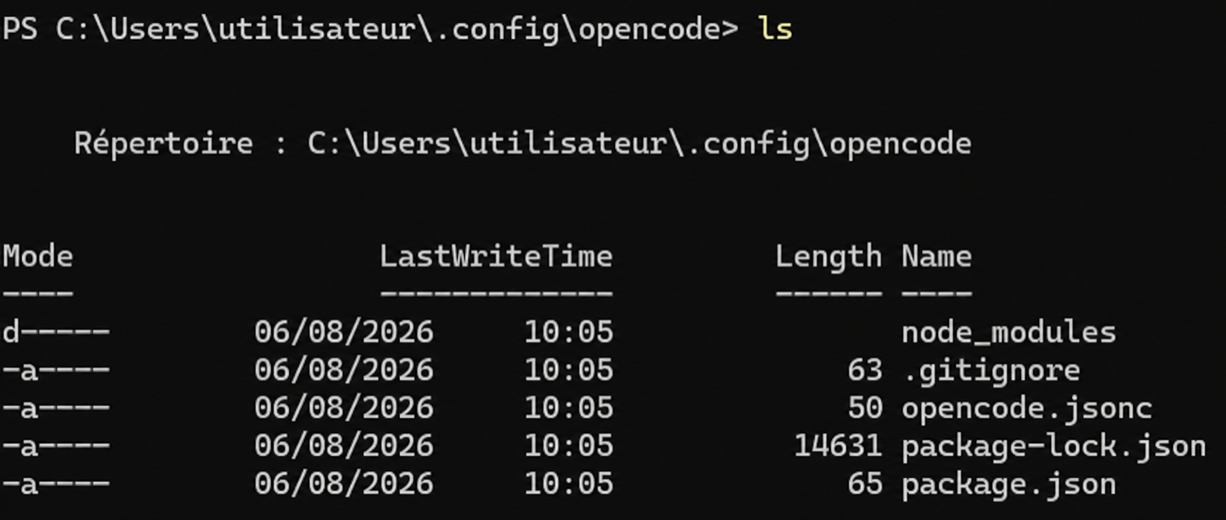
Make sure the file is named opencode.jsonc, not opencode.jsonc.txt.
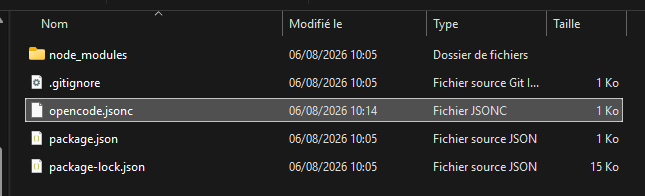
Copy this configuration into the file:
{
  "$schema": "https://opencode.ai/config.json",
  "provider": {
    "clovis": {
      "npm": "@ai-sdk/openai-compatible",
      "name": "Clovis",
      "options": {
        "baseURL": "https://llm-gateway.clovis-ai.fr/v1"
      },
      "models": {
        "ClovisLLM": {
          "name": "ClovisLLM"
        }
      }
    }
  },
  "model": "clovis/ClovisLLM"
}
The model property automatically selects ClovisLLM at startup. You must enter the clovis provider ID exactly as written when connecting.
3. Store the Clovis API key
Go to the project you want to work on, then start OpenCode:
cd /path/to/your/project
opencode
In OpenCode:
- enter
/connect; - select Other Custom provider;
- enter exactly
clovisas the provider ID; - paste your Clovis API key and confirm.
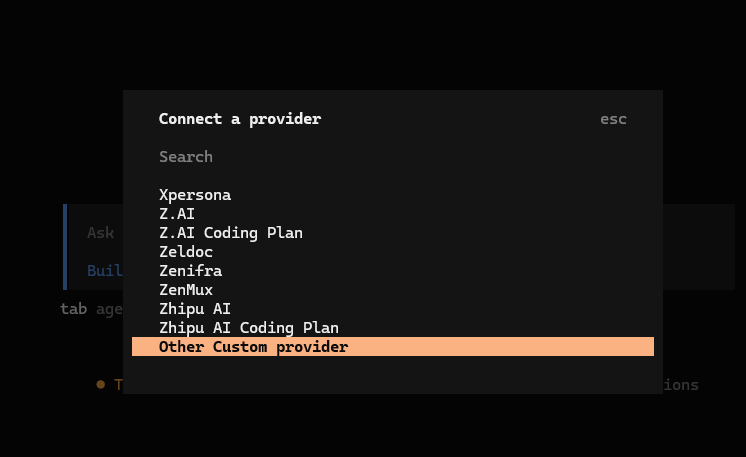
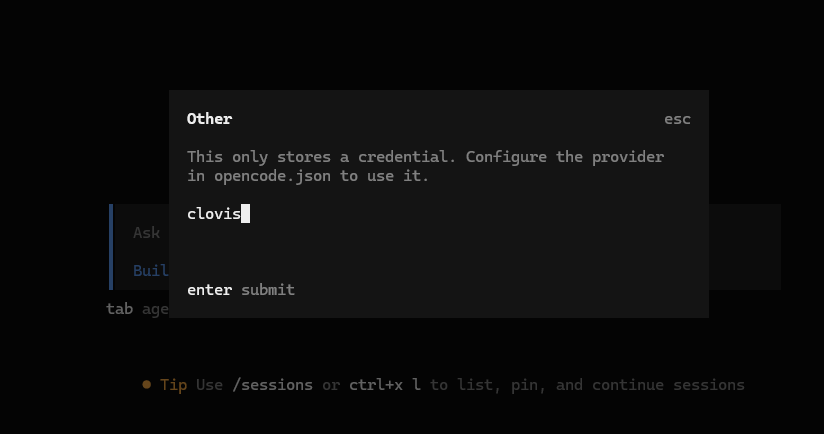

clovis?OpenCode associates the stored key with the provider.clovis section of the configuration file. A difference in spelling or capitalization prevents this association.
You can confirm that the provider ID is registered with:
opencode auth list
4. Verify the connection
Restart opencode if necessary. The home screen should display ClovisLLM as the active model.
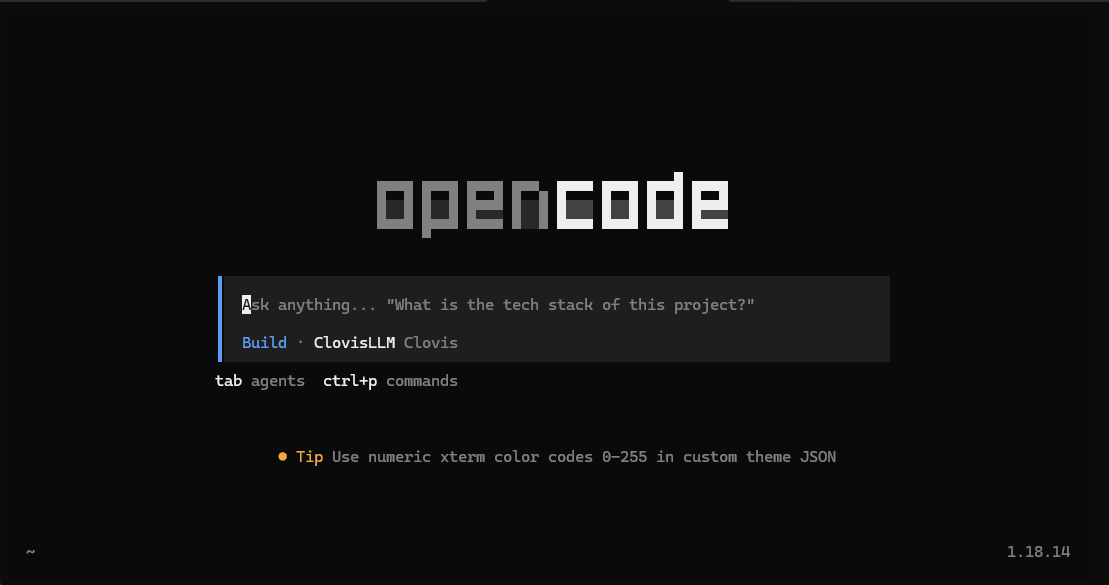
Try an initial request, for example:
Explain the structure of this project and list the available test commands.
To initialize repository-specific instructions, run /init. OpenCode analyzes the project and proposes an AGENTS.md file: review it before keeping it in Git.
Troubleshooting
| Problem | Check |
|---|---|
opencode is not recognized | reopen the terminal, then check that the global npm directory is present in the PATH |
| ClovisLLM does not appear | check the path and syntax of opencode.jsonc, then restart OpenCode |
| The key is not being used | check that the provider ID entered with /connect is exactly clovis, then run opencode auth list |
| The native Windows installation causes problems | use WSL, which OpenCode recommends for full compatibility |
Go further
- Installation and getting started
- JSON/JSONC configuration
- Providers and authentication
- OpenCode agents
To update an npm installation:
npm update -g opencode-ai